It is easier than ever to take high-quality images. Just about everyone has a camera on them at all times and the quality of cell phone cameras just keeps getting better. Apple’s newest release boasts the ability to take billboard quality images in the palm of your hand.
Whether you are a budding photographer, hobbyist crafter, or digital artist, you may know everything about creating a pixel-perfect image but not much about printing your work.
Creating something tangible like a print is a different skill set than composing the perfect image. Don’t fret, we’ll walk you through the steps you need to take when figuring out how to improve print quality for your images.
The Best Print Starts with the Best Image
If you’re a complete beginner let’s go over some of the ways to improve image quality before it gets to the printer. The best printing process can’t spit out a high-quality print of a low-quality photo.
For photography make sure when you take a photo you’ve checked and then re-checked the focus. Your print is going to be bigger than your phone or camera screen, so even a slightly out-of-focus image will be obviously blurry when you blow it up.
If you can manually adjust shutter speed use a fast shutter to avoid camera shake. If you must use a slow shutter, make sure you are using a tripod or other steadying tool.
If you have the option to shoot in JPEG or RAW, choose RAW. RAW preserves more image information and is a multi-layered file, which will live you more options in the editing process.
If you don’t have RAW as an option then JPEG is fine. This more compressed file is far smaller and takes up less room on your device. With all the editing options out there you’ll still be able to do wonders with a JPEG.
Document and Device Settings
If you’re planning on printing large make sure your image is large. On your document check the image size. Depending on the software you’re using this will be under something like about, settings, file size, or image information. You should see the size in pixels or inches.
Set the image at around 300ppi (pixels per inch). If that makes your image too large for your device, you can try a minimum of 180ppi, anything smaller and your image will lose detail and sharpness.
Printing Paper
Thinking about paper isn’t the most exciting thing, but it is vital to the quality of your final print.
Photo Paper
Photo paper is a top choice for printing any image. Yes, it says photo paper, but you can use this for art prints, invitations, flyers, and whatever else you need to be printed. When shopping, you can decide between glossy and matte paper.
Glossy vs Matte FInish
Glossy is what you think of when you think of printed photos- it has that shiny finish on the photo side and is flat white on the other. Matte is the unshiny option that creates a nice old-fashioned solid finish.
Paper Weights
If you’re printing a very detailed and colorful picture, then you should experiment with heavyweight paper. Standard printer paper is thinner than either photo or heavy paper and can wrinkle when too much ink is applied.
There are different heavy paper weights (they range from 65-120lbs), so you can try out different types to see which gets you the look you want. You’ll notice slightly different outcomes with different paper stock. For example, a highly saturated image will look better and crisper on heavier paper since it can take the ink load.
Canvas
Some printers are even able to print directly onto canvas. If you’re making an art print and want the traditional look, check for a canvas option on your printer’s settings.
In addition to having an “I just made this” look, canvas tends to be more forgivable to imperfections. The rippling and uneven surface could hide minor mistakes if you didn’t start with a perfect image.
Side note: Most home canvas prints only print up to 17×11, if you want a larger print you can either opt for a commercial grade printer or go with a canvas print company.
Print Settings
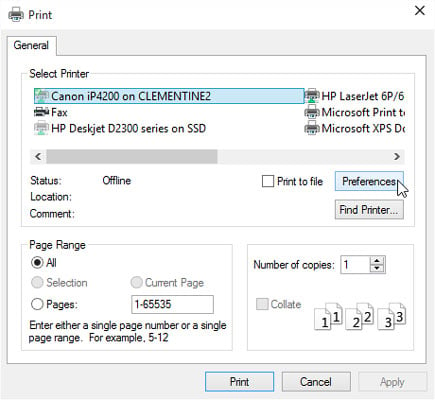
Here’s where it can get a little tricky since everyone has access to a different printer. You should understand at least the basic settings of the printer you are using.
Most printers today will have some sort of screen interface where you can select different settings. So, suppose you chose to use photo paper. In that case, you can choose “photo paper” (with other options for “glossy” or “matte”) from a dropdown menu on either the printer itself or your computer’s Print Settings dialog box.
When you select “print” from your document, you will probably have image quality options appear. Select “best photo” or its equivalent (this could be “preserve image quality”). If you’re printing from image editing software (like Photoshop), you will see printer options when selecting “print.” There you can set up everything like color profile, image quality, and sizing.
Printer Ink
You should look up your specific printer model and check what kind of ink is available for it. Inkjet printers use either dye-based or pigment-based inks. Pigment-based inks are more expensive but tend to last longer by being denser and fade-resistant. If you have an inkjet printer, consider splurging on pigment ink.
Laser printers use toner (which is actually a powder). This will be fine for most images, but you’ll want to find an inkjet printer for crisp, colorful pictures on heavy paper. Also, laser printers use heat in the printing process. Not all paper will be suitable for laser printers, so make sure your paper is correct for your printer type.
For either type of printer, make sure the ink you buy is for that same printer. Printers aren’t highly interchangeable like some other machines. You need to buy ink for your exact model, or the cartridge may not fit.
Preserve Your Final Print with a Sealer
The title here is self-explanatory. If you don’t already have one buy a sealer you can apply to your final print. This will keep it looking great for a long time. A sealer protects against fade and light moisture.
When to Print at a Shop
Many people think doing something yourself is cheaper than paying someone else, but that’s not always true. Printing is an expensive process, and if you have a few “fits and starts” and need to re-do work a couple of times, that multiplies the expenses even further.
Going to a printing shop or online service will probably be easier if you have a huge order you need to fill. They often offer discounts for bulk orders and buy their own materials (paper and ink) in bulk, bringing down the cost.
If you don’t have access to the printers or materials mentioned here, letting someone else do the printing will ensure the highest quality print of your work. You can use all of the tips discussed here when giving the print shop directions. You’ll see that they will ask about the paper type and weight, finish, and more.
Triangulation evaluates the best print companies each year:
Best Canvas Print Companies
Best Metal Print Companies
Best Acrylic Prints CompaniesTake a look and let us know what you think!
Conclusion
Achieving high-quality prints at home is simple. Start with a high-quality image, choose the right materials, and know your printer settings. Handoff your printing to a professional if necessary. Play around with different settings and papers to personalize your images.